之前写过一篇使用certbot申请通配符证书的操作;由于工作需要,现使用了acme.sh这款脚本工具,相比之下,它具有更加轻量、兼容性强的特点,不必安装Python和相关依赖。
项目地址:Github地址。
项目说明中也有相应的安装使用过程,这里结合实际操作一下
安装
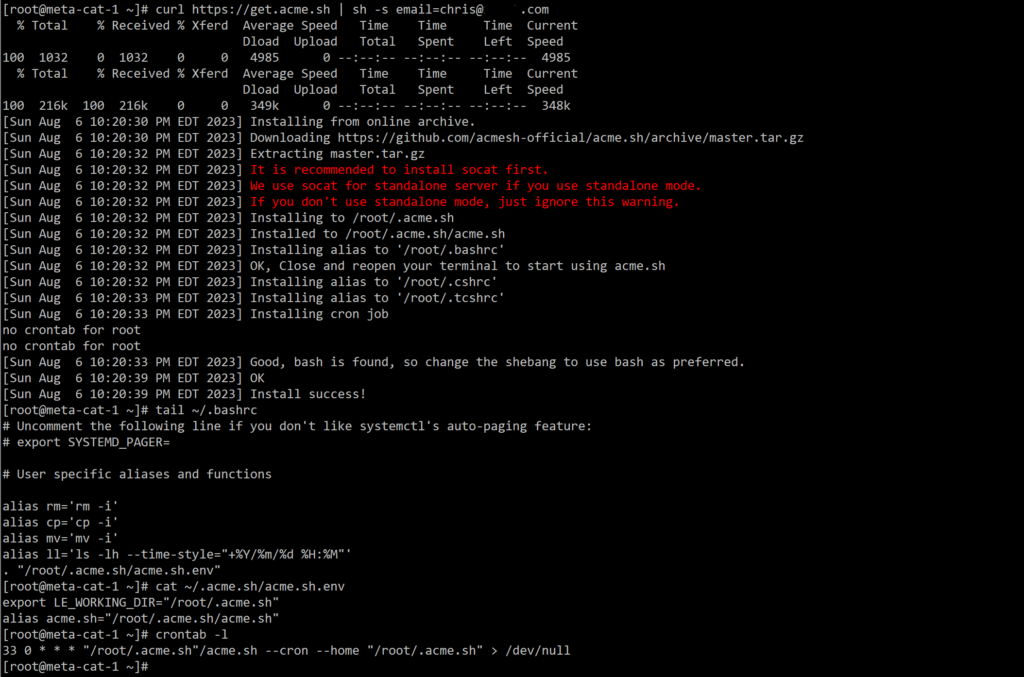
使用curl下载安装脚本并设置联系邮箱:
curl https://get.acme.sh | sh -s [email protected]
其会将脚本集下载到用户home目录下:~/.acme.sh/ ;并创建一个alias,以方便执行 ~/.acme.sh/acme.sh ;自动创建cronjob,每天自动检查所有证书,如果有快过期的,则会进行更新:
上面红字提示,建议安装socat,单机模式需要使用它,使用yum安装下即可:
yum install -y socat
重新登陆下,后续开始申请证书操作。
域名授权
通过接口授权,可修改域名DNS解析,进行证书申请;这里以阿里云为例:创建RAM子用户,开通Accesskey访问,赋予管理DNS的权限即可:
将用户的Accesskey保存到account.conf配置文件中:
vim ~/.acme.sh/account.conf
...
SAVED_Ali_Key='Your AccessKey ID'
SAVED_Ali_Secret='Your AccessKey SECRET'
如果使用的是cloudflare,对应的则是 SAVED_CF_Token,SAVED_CF_Account_ID,SAVED_CF_Zone_ID,SAVED_CF_Key,SAVED_CF_Email。
之所以是这些,在其对应的 ~/.acme.sh/dnsapi/ 脚本中有写。
申请证书
使用如下命令申请证书并打印详细日志:
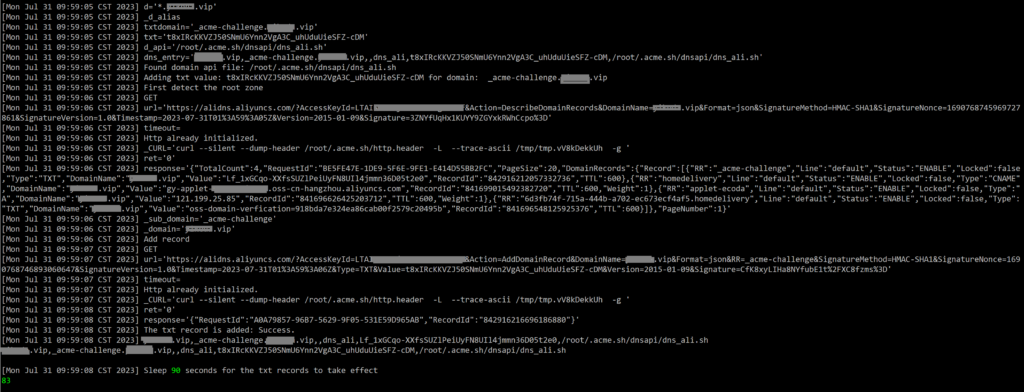
acme.sh --issue --dns dns_ali -d xxx.vip -d "*.xxx.vip" --force --dnssleep 90 --output-insecure --debug 2
其会打印出通过阿里DNS授权修改解析过程,并最终在 ~/.acme.sh/xxx.vip 下生成证书。
页码: 1 2


I am really impressed with your writing skills
and also with the layout on your blog. Is this a paid theme or did you
customize it yourself? Either way keep up
the excellent quality writing, it’s rare to see a
nice blog like this one today.
I’m curious to find out what blog platform you are utilizing?
I’m experiencing some small security problems with my latest blog and I’d like to find something more
safeguarded. Do you have any suggestions?
I’m using wordpress.
Thanks for thr great article!