Nw-Base主机(220.140)
MySQL
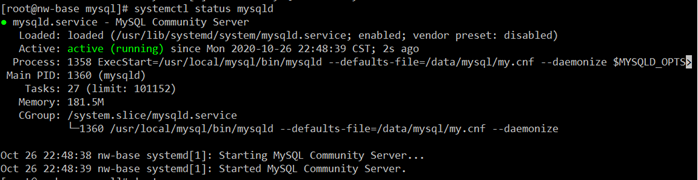
MySQL部署于172.16.220.140物理主机上,部署方式为源码编译部署;具体部署过程可见相关文档。数据库储存路径为:/data/mysql/。
Redis
Redis也部署于 172.16.220.140 物理主机上,部署方式为源码编译部署;过程如下:
- 下载:
wget http://download.redis.io/releases/redis-5.0.8.tar.gz
tar zxf redis-5.0.8.tar.gz -C /usr/local/src/
cd /usr/local/src/redis-5.0.8/
- 安装:
groupadd -g 415 redis useradd -g redis -u 415 -s /sbin/nologin -d /data/redis -c "Redis Server" -M redis make PREFIX=/data/redis/ CFLAGS="-fPIC" make PREFIX=/data/redis/ install echo 'export PATH=/data/redis/bin/:$PATH' > /etc/profile.d/redis.sh source /etc/profile.d/redis.sh redis-cli -v mkdir /data/redis/{db,logs} chown -R redis:redis /data/redis/ cp redis.conf /data/redis/ - 修改配置,设置密码:
sed -i 's/^bind 127.0.0.1/bind 0.0.0.0/g' /data/redis/redis.conf
sed -i 's#^pidfile /var/run/redis_6379.pid#pidfile /data/redis/redis.pid#g' /data/redis/redis.conf
sed -i 's#^dir ./#dir /data/redis/db#g' /data/redis/redis.conf
sed -i 's#^logfile ""#logfile "/data/redis/logs/redis.log"#g' /data/redis/redis.conf
sed -i 's/^# requirepass .*/requirepass Zs20191001/' /data/redis/redis.conf
- 设置服务:
vim /lib/systemd/system/redis.service
# Redis Service
[Unit]
Description=Redis Community Server
After=network.target

[Install]
WantedBy=multi-user.target

[Service]
User=redis
Group=redis
LimitNOFILE=65535
LimitNPROC=65535
ExecStart=/data/redis/bin/redis-server /data/redis/redis.conf
Restart=on-failure
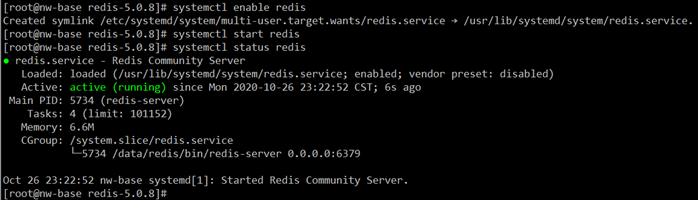
systemctl enable redis
systemctl start redis
systemctl status redis
- 防火墙设置(如果有):
firewall-cmd --permanent --add-port=6379/tcp
firewall-cmd --reload
JAVA环境
tar zxf jdk-8u271-linux-x64.tar.gz -C /usr/local/
echo 'export JAVA_HOME=/usr/local/jdk1.8.0_271' > /etc/profile.d/java.sh
echo 'export PATH=$JAVA_HOME/bin:$PATH' >> /etc/profile.d/java.sh
source /etc/profile.d/java.sh
java -version

Nginx
部署
安装:
yum install -y pcre-devel
tar zxf nginx-1.18.0.tar.gz -C /usr/local/src/
cd /usr/local/src/nginx-1.18.0/
groupadd -g 211 ngx
useradd -g ngx -u 211 -s /sbin/nologin -c "Nginx Server" -M ngx
./configure --prefix=/data/nginx --user=ngx --group=ngx --with-threads --with-http_realip_module --with-http_ssl_module --with-stream --with-stream_ssl_module --with-http_stub_status_module --with-http_gzip_static_module --with-http_slice_module --with-cc-opt="-I/usr/local/openssl/include" --with-ld-opt="-L/usr/local/openssl/lib"
make -j `cat /proc/cpuinfo | grep processor | wc -l` && make install
配置文件:
cd /data/nginx
sed -i '1s/^$/# Nginx Main Configure File./' conf/nginx.conf
sed -i '2s/^#//' conf/nginx.conf
sed -i '2s/nobody/ngx/' conf/nginx.conf
sed -i '35,116d' conf/nginx.conf
sed -i '$ i \ \ \ \ include vhosts/*.conf;' conf/nginx.conf
mkdir conf/vhosts
设置服务:
vim /usr/lib/systemd/system/nginx.service
# systemd service file for Nginx server
[Unit]
Description=The NGINX HTTP and reverse proxy server
After=syslog.target network.target remote-fs.target nss-lookup.target

[Install]
WantedBy=multi-user.target

[Service]
Type=forking
PIDFile=/data/nginx/logs/nginx.pid
ExecStartPre=/data/nginx/sbin/nginx -t
ExecStart=/data/nginx/sbin/nginx
ExecReload=/data/nginx/sbin/nginx -t
ExecReload=/bin/kill -s HUP $MAINPID
ExecStop=/bin/kill -s QUIT $MAINPID
PrivateTmp=true
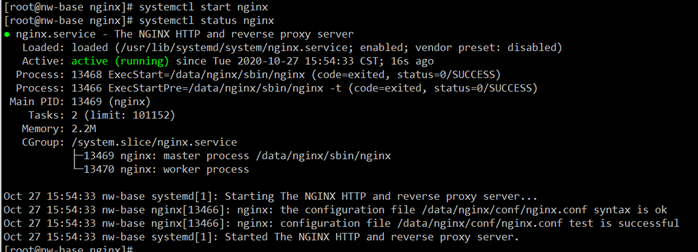
systemctl enable nginx
systemctl start nginx
systemctl status nginx
设置转发
设置gitlab转发:
cd /data/nginx/conf/vhosts/
vim gitlab.conf
# Nginx Second Configure File.
upstream nw-gitlab {
        server 172.16.220.139:80;
}
server {
        listen 80;
        server_name nw-gitlab.zongs365.cc;
        access_log logs/gitlab_access.log;
        error_log  logs/gitlab_error.log ;
    location / {
        proxy_pass http://nw-gitlab;
        proxy_set_header Host $host;
        proxy_set_header X-Real-IP $remote_addr;
        proxy_set_header X-Forwarded-For $proxy_add_x_forwarded_for;
    }
}
其它转k8s内服务:
vim k8s.conf
# Nginx Second Configure File.
upstream ingress-http {
        server 172.16.220.141:23456;
        server 172.16.220.142:23456;
}
server {
        listen 80 default_server;
        access_log logs/k8s_access.log;
        error_log  logs/k8s_error.log ;
    location / {
        proxy_pass http://ingress-http;
        proxy_set_header Host $host;
        proxy_set_header X-Real-IP $remote_addr;
        proxy_set_header X-Forwarded-For $proxy_add_x_forwarded_for;
    }
}
使用TCP协议监听443端口:
vim /data/nginx/conf/nginx.conf
...
stream {
    include vhosts/*.stream;
}
...
vim k8s.stream
# Nginx Stream Second Configure File.
upstream ingress-https {
        server 172.16.220.141:23457;
        server 172.16.220.142:23457;
}
server {
        listen 443;
        proxy_pass ingress-https;
}
使配置生效:
systemctl reload nginx
Jenkins
新建测试用于发布的Jenkins部署于 172.16.220.140 物理主机上,部署方式为WAR包部署,过程如下:
- 下载:
wget https://mirrors.tuna.tsinghua.edu.cn/jenkins/war-stable/2.263.2/jenkins.war mkdir -p /data/jenkins/{app,logs,.m2} cp -p jenkins.war /data/jenkins/app/ - 创建运行用户:
groupadd -g 498 jenkins
useradd -g jenkins -u 498 -s /bin/false -d /data/jenkins -c "Continuous Integration Server" -M jenkins
chown -R jenkins:jenkins /data/jenkins
- mvn用户配置文件:
建立配置文件,设置mvn仓库使用本地nexus私服。
vim /data/jenkins/.m2/settings.xml
<?xml version="1.0" encoding="UTF-8"?>
<settings>
<profiles>
  <profile>
    <id>nexus</id>
    <properties>
      <maven.compiler.source>1.8</maven.compiler.source>
      <maven.compiler.target>1.8</maven.compiler.target>
      <maven.compiler.compilerVersion>1.8</maven.compiler.compilerVersion>
    </properties>
    <repositories>
      <repository>
        <id>local-nexus</id>
        <url>http://nw-nexus:8081/repository/maven-public/</url>
        <releases>
          <enabled>true</enabled>
        </releases>
        <snapshots>
          <enabled>true</enabled>
        </snapshots>
      </repository>
    </repositories>
    <pluginRepositories>
      <pluginRepository>
        <id>local-nexus</id>
        <url>http://nw-nexus:8081/repository/maven-public/</url>
        <releases>
          <enabled>true</enabled>
        </releases>
        <snapshots>
          <enabled>true</enabled>
        </snapshots>
      </pluginRepository>
    </pluginRepositories>
  </profile>
</profiles>
<activeProfiles>
  <activeProfile>nexus</activeProfile>
</activeProfiles>
</settings>
由于我们不直接在全局的settings.xml中插入<repositories>元素,这里添加了一个profile并使用<activeProfile>元素自动将这个profile激活。这里的local-nexus仓库指向了Nexus中默认的“maven-public”仓库组,即所有该仓库组包含的仓库都能供我们使用。此外,通过<releases>和<snapshots>元素激活了Maven对于仓库所有类型构件下载的支持,当然你也可以调节该配置,比如说禁止Maven从Nexus下载snapshot构件。
并且设置指定了maven构建所使用JAVA编译器 -source 和 -target 的版本为1.8。
使用该配置,Maven就会从Nexus服务器下载构件了。
- 手工方式启动:
su - jenkins -s /bin/bash -c "cd /data/jenkins/app ; java -server -Xms128m -Xmx1024m -jar jenkins.war -DJENKINS_HOME=/data/jenkins --httpPort=8180 --logfile=/data/jenkins/logs/jenkins.log > /dev/null" &
tail -f /data/jenkins/logs/jenkins.log

- 初始化:
访问http://172.16.220.140:8180/,将日志中的安装密码复制进去后设置。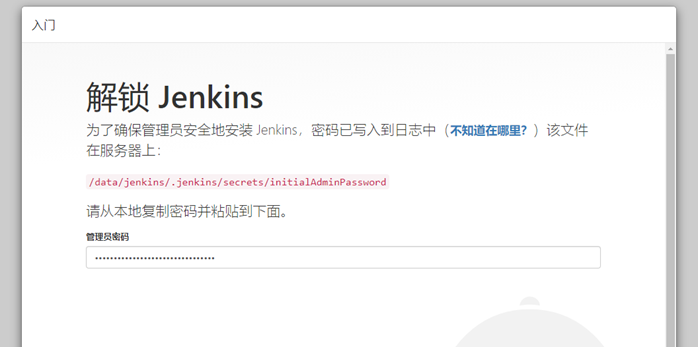
完成之后,会提示创建初始管理员账号: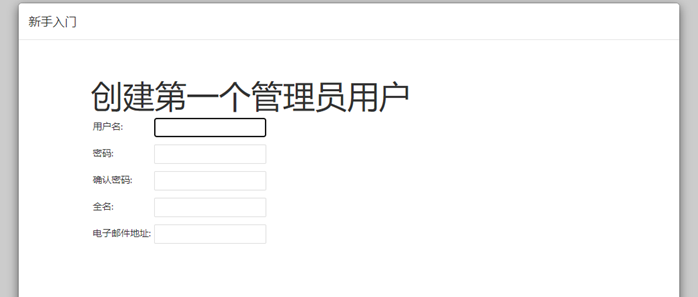
Tips:初始化完成之后,用于初始化的密码文件会自动删除。 - 设置为服务:
注意先结束掉手工启动的进程。
vim /data/jenkins/start.sh
#!/bin/bash
cd /data/jenkins/app
java -server -Xms1024m -Xmx1536m -jar jenkins.war -DJENKINS_HOME=/data/jenkins --httpPort=8180 --logfile=/data/jenkins/logs/jenkins.log > /dev/null &
chmod +x /data/jenkins/start.sh
vim /usr/lib/systemd/system/jenkins.service
# systemd service file for Jenkins
[Unit]
Description=Jenkins Automatic
After=syslog.target network.target remote-fs.target nss-lookup.target

[Install]
WantedBy=multi-user.target

[Service]
Type=forking
User=jenkins
WorkingDirectory=/data/jenkins
Environment="JAVA_HOME=/usr/local/jdk1.8.0_271"
Environment="PATH=/usr/local/jdk1.8.0_271/bin:/bin:/usr/bin:/usr/local/bin:/usr/local/nodejs/bin"
ExecStart=/data/jenkins/start.sh
Restart=on-failure
KillMode=mixed
systemctl enable jenkins
systemctl start jenkins
systemctl status jenkins
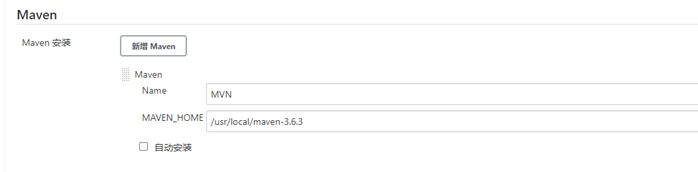
- 全局工具配置:
JDK:
Maven: